This article is provided as a courtesy to our customers to help you configure your Outlook software to work with (mt) Media Temple's hosting solutions.
+=====================================================+
FOR WEBMAIL LOGIN
GOTO
http://yourwebsite:2095
Email - User@DomainName.com
Password - Use your email account’s password.
==========================================================
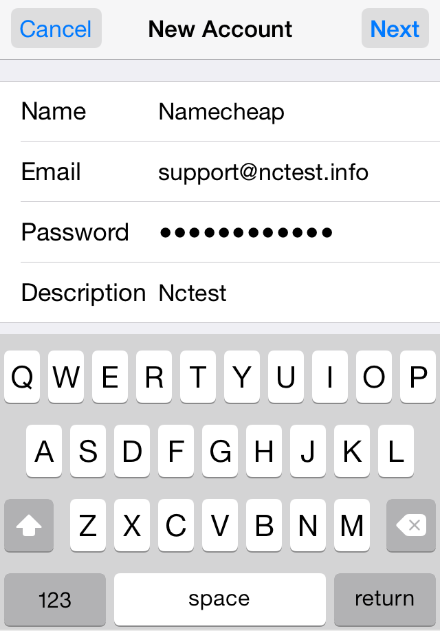
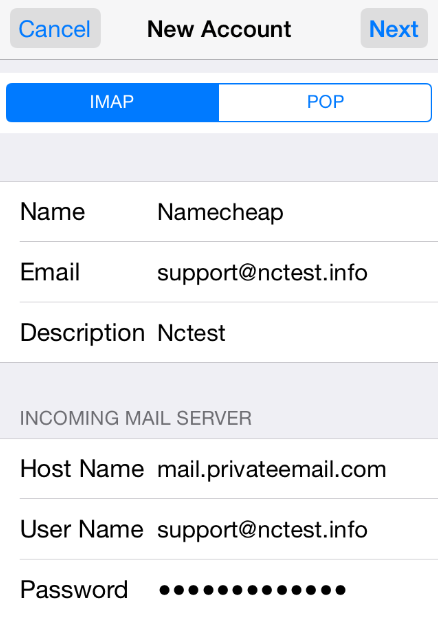
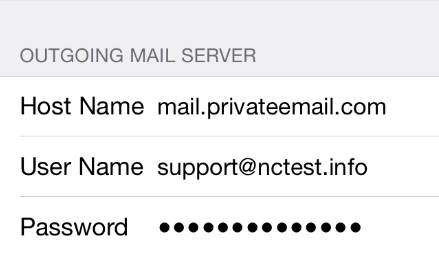
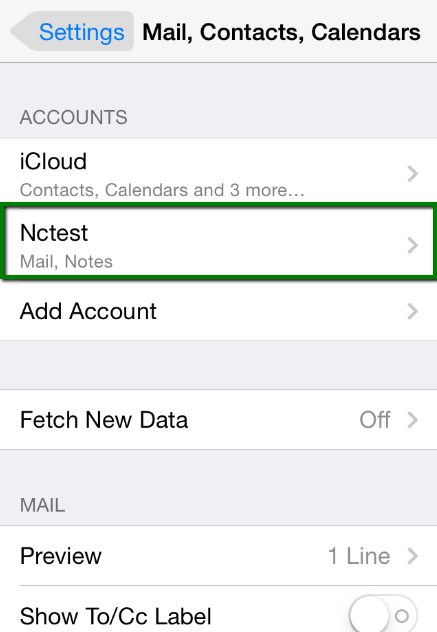
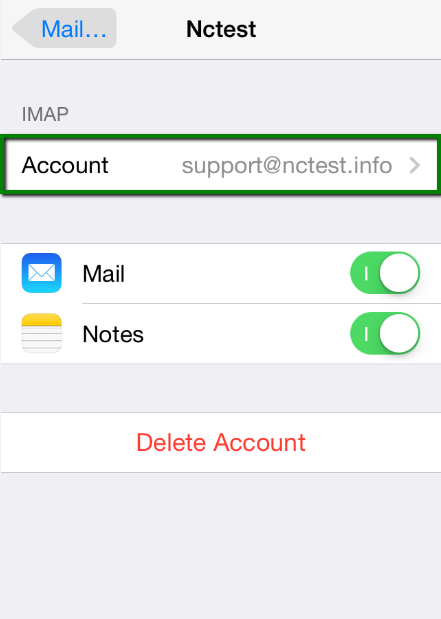
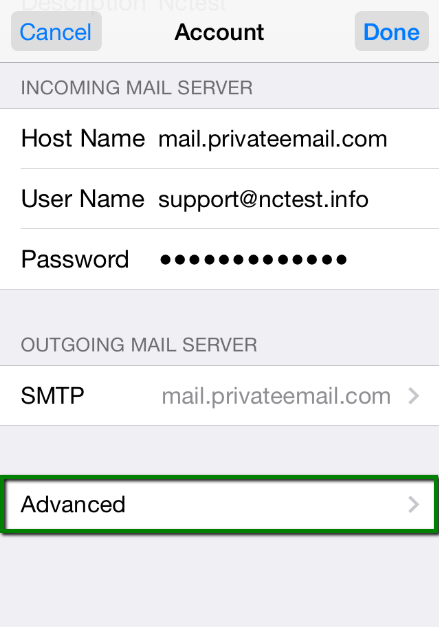
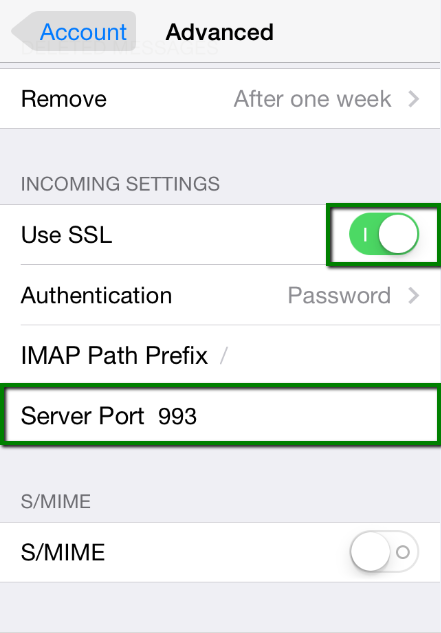
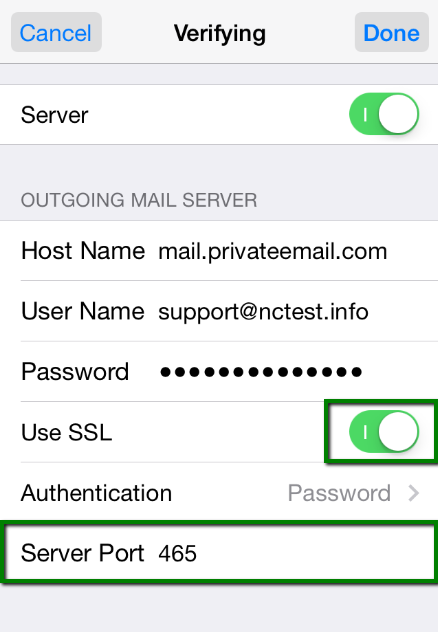
For Mail Client Manual Settings For Mobile
Password: Your Password.
IMAP Port: 993
POP3 Port: 995
SMTP Port: 465
IMAP, POP3, and SMTP require authentication.
==========================================================
NOTE :
===============================================================
TO CHANGE THE PASSWORD
Login
Click on your email address at top right corner
Select Password and Security option
And enter New Password to change .
+=====================================================+
READ ME FIRST
This article is provided as a courtesy. Installing, configuring, and troubleshooting third-party applications is outside the scope of support provided by (mt) Media Temple. Please take a moment to review the
Statement of Support.
CONFIGURE OUTLOOK 2011
- Open Outlook 2011.
- If this is your first time using Outlook 2011, you'll see a welcome banner like the one in Figure 1.
 Figure 1:
 Click image for a larger view.
- If you are adding another email account to Outlook, from the top menu, click on Tools. Then click on Accounts. See Figure 2.
 Figure 2:
 Click image for a larger view.
- Click on the Email Account icon, see Figure 3.
 Figure 3.
- This window is where you enter your email information, see Figure 4 below.
 Figure 4:
Enter your email account information in this window.
- Enter Your Name as you want it to appear.
- Enter your full email address username@example.com in the Email address: field.
- Select POP3 or IMAP. We recommend IMAP. Learn more about the differences here.
- Enter mail.example.com in the Incoming mail (POP3, IMAP) server: field.
- Enter mail.example.com in the Outgoing mail (SMTP) server: field. To avoid common authentication issues with Outlook, we strongly advise using SSL and port 465 for SMTP connections.
- Enter your full email address, username@example.com, in the User Name field.
- Enter your email password in the Password: field.
TIP:
If you experience any difficulty with the default outgoing SMTP Port 25, you can check the box
Override default port and enter 587
or an alternate port you enabled. We also strongly recommend using SMTP and port 465 with Outlook. For more information, please see:
How do I enable an alternate SMTP port?
- Next, we'll configure your Outgoing server settings. Click on the More Options... button. For Authentication, select Use Incoming Server Info. To avoid common authentication issues with Outlook, we strongly advise using SSL and port 465 for SMTP connections. Click OK to save your settings.
 Figure 5.
CONFIGURE OUTLOOK 2010
1. Open Outlook 2010.
2. Click File, then Add Account. See Figure 1 below.
 Figure 1:
 Click the "+Add Account" button to begin.
Enter your full email address and password. Outlook should automatically configure your account for you. If not, proceed to the next section.
Manually configure Outlook 2010
1. Open Outlook 2010.
2. Click File, then Add Account. See Figure 1 below.
Figure 1: Click the "+Add Account" button to begin.
3. Next, select Manually configure server settings or additional server types, then click Next. See Figure 2 below.
 Figure 2:
 This will allow you to enter your account information.
4. In this screen, choose Internet E-mail, then click Next. Figure 3 below illustrates this window.
 Figure 3:
 Be sure to select "Internet E-mail" then click the "Next" button.
5. This window is where you enter your email information, see Figure 4 below.
 Figure 4:
 Enter your email account information in this window.
- Enter Your Name as you want it to appear.
- Enter your full email address username@example.com in the Email address: field.
- Select POP3 or IMAP. Learn more about the differences here.
- Enter mail.example.com in the Incoming mail (POP3, IMAP) server: field.
- Enter mail.example.com in the Outgoing mail (SMTP) server: field. To avoid common authentication issues with Outlook, we strongly advise using SSL and port 465 for SMTP connections.
- Enter your full email address, username@example.com, in the User Name field.
- Enter your email password in the Password: field.
6. Perform the following steps:
- Click on More Settings... see Figure 5 for the location of this button.
 Figure 5:
 This will open a new window.
- Click on the Outgoing Server tab. Check My outgoing server (SMTP) Requires Authentication. Make sure Use same setting as my incoming mail server is also checked. Click on OK. See Figure 6 as reference.
 Figure 6:
 Be sure to confirm these settings.
7. Click the Test Account Settings button and you should see all items with green check marks... Click the Close Button to close the test window.
Click OK to save your settings.
Congratulations. You have finished the setup of your email account. Click Finish to close the setup wizard.
CONFIGURE OUTLOOK 2007
- Open Outlook 2007.
- Click the Tools menu, and select Account Settings.
- Click on the Email tab and click on the New... button.
- Next select Microsoft Exchange, POP3, IMAP or HTTP and click Next.
Enter your full email address and password. Outlook should automatically configure your account for you. If not, proceed to the next section.
Manually configure Outlook 2007
- Select Internet E-mail option and click Next.
- Fill in the following fields:
- Enter Your Name as you want it to appear.
- Enter your full email address username@example.com in the Email address: field.
- Select POP3 or IMAP.
- Enter mail.example.com in the "Incoming mail (POP3, IMAP) server:" field.
- Enter mail.example.com in the "Outgoing mail (SMTP) server:" field.
- Enter your username username@example.com in the "Account name:" field.
- Enter your email password in the Password: field.
- Perform the following steps:
- Click on More Settings...
- Click on the Outgoing Server tab.
- Check My outgoing server (SMTP) Requires Authentication.
- Make sure Use same setting as my incoming mail server is also checked.
- Click on OK.
- Click the Test Account Settings button and you should see all items with green check marks... Click the Close Button to close the test window. Click OK to save your settings.
- Congratulations. You have finished the setup of your email account. Click Finish to close the setup wizard.
CONFIGURE OUTLOOK 2003
- Open Outlook 2003.
- Click the Tools menu and select E-mail Accounts....
- Click Add a new e-mail account and then click Next.
- Select POP3 or IMAP and click Next.
TIP:
(mt) Media Temple servers support POP3 and IMAP. Learn more:
Using Email.
- Fill in the following fields:
- Enter Your Name as you want it to appear.
- Enter your full email address username@example.com in the "Email address:" field.
- Enter your username username@example.com in the "Account Name:" field.
- Enter your email password in the Password field.
- Enter mail.example.com in the "Incoming mail (POP3, IMAP) server:" field.
- Enter mail.example.com in the "Outgoing mail (SMTP) server:" field.
- Perform the following steps:
- Click on More Settings...
- Click on the Outgoing Server tab.
- Check My outgoing server (SMTP) Requires Authentication.
- Make sure Use same settings as my incoming mail server is also checked.
- Click on OK.
- Click the Test Account Settings button and you should see all items with green check marks. Click Close to close the test window.
- Click Next to save your settings.
- Congratulations. You have finished the setup of your email account. Click Finish to close the Setup Wizard.
CONFIGURE OUTLOOK EXPRESS AND OUTLOOK 2002
- Open Outlook or Outlook Express.
- Click the Tools menu, and select Accounts...
- Click Add and then click Mail...
- Enter your name in the Display name: field, and click Next.
- Enter your full email address (example: username@example.com) in the E-mail address: field and Click Next.
- Enter mail.example.com in the Incoming mail (POP3, IMAP or HTTP) server: field. Enter mail.example.com in the Outgoing mail (SMTP) server: field. You can also use your IP address. To avoid common authentication issues with Outlook, we strongly advise using SSL and port 465 for SMTP connections.
- Enter your username, username@example.com (same as your email address) in the Account name field. Enter your email password in the Password: field, and click Next.
- As for the Import screen: if you do not want to import information click Do not import at this time and click Next.
- Click on Finish. You MUST do the next steps to be able to send email via your server.
- Click the Tools menu, and select Accounts...
- Highlight mail.example.com under Account, and click Properties.
- Click the Servers tab, and check the box next to My server requires authentication. Then click on the Settings button.
- Verify the Login Information is set to use same settings as my incoming mail server then click OK.
- Click OK for the properties window now.
TROUBLESHOOTING
If you experience an issue sending email, you can try the following:
Click on More Settings...
Click the Advanced tab, and change the Outgoing server (SMTP) port to the alternate port of 465, with SSL encryption, then click on OK.

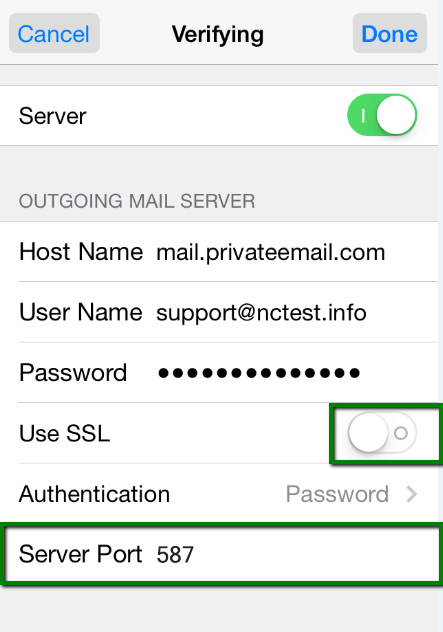
Port 587 is also available as an alternate (unencrypted) SMTP port for the Grid. However, Outlook may still persist with authentication errors if SSL is not used when sending mail.